Assalamualaikum,
There are several Operating System that you can choose to install into your Raspberry Pi. It even support Windows 10. You can refer to this link for the supported OS. For me, I choose their official supported Operating System which is Raspbian and it is based on Debian.
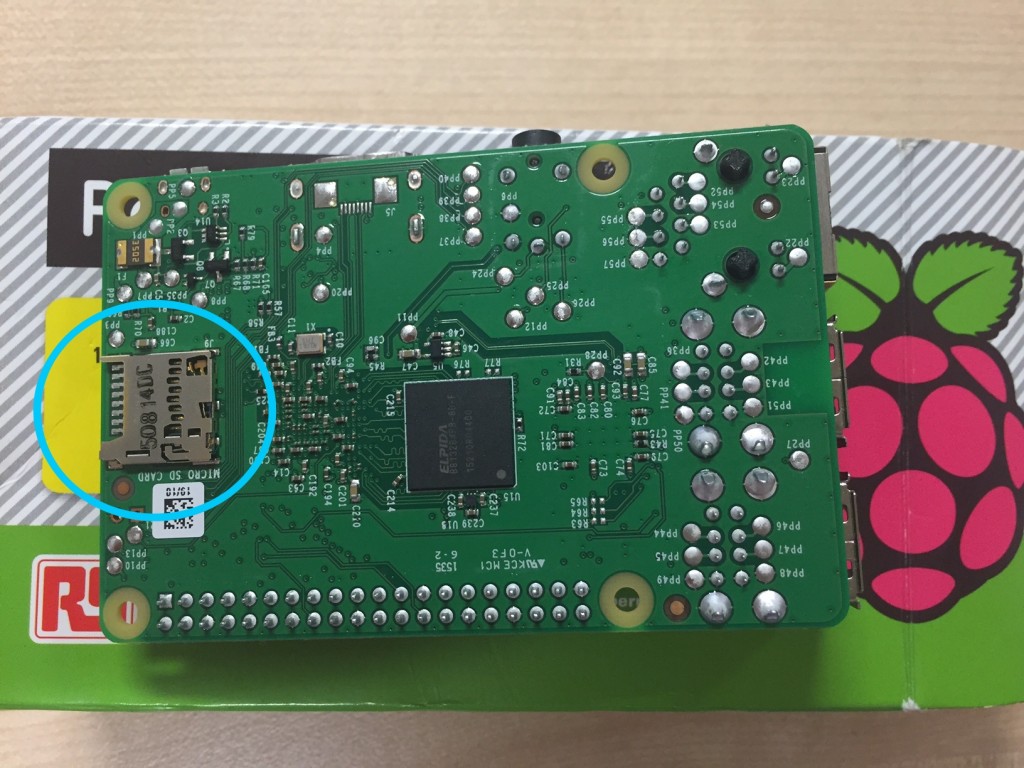
If you are new to this, you might be questioning yourself how to install the operating system? Where does it installed to? Refer back to the technical specifications in my post earlier, there is a microSD slot located at the back of your Raspberry Pi. Below is a picture that I have taken for your reference.
You will need to buy a micro SD card or purchase a pre-installed NOOBS (New Out Of the Box Software) which comes with a 8GB SD card from RS or Element14. In my case, I bought a Sony microSDHC 8GB Class 10 microSD card from a local IT store in Malaysia. I will explain how to do the installation afterwards. Below is the basic things that you need before you proceed with the installation:
- microSD card (recommended 8GB). Refer to this link for supported microSD card.
- A computer with internet access and SD card reader to download the Operating System and to format the microSD card.
- USB Mouse
- USB Keyboard
- HDMI cable
- HDMI-supported monitor or TV. If you have a VGA monitor, you can buy a HDMI to VGA converter.
- A microUSB header power adapter. In my case, I use a power bank to connect to my Raspberry Pi.
You can follow below step by step in order to install the OS for your Raspberry Pi:
DOWNLOADING OS
- Download Raspbian from Raspberry Pi official download page. I choose to download Raspbian Jessie kernel v4.1 via Torrent since it is much faster compared to Download ZIP from Raspberry Pi official page.
- Extract the ZIP file that you have downloaded in your computer.
FORMATTING microSD CARD
- Insert the microSD card (with the adapter of course) into your computer and make sure that your computer is able to recognise it.
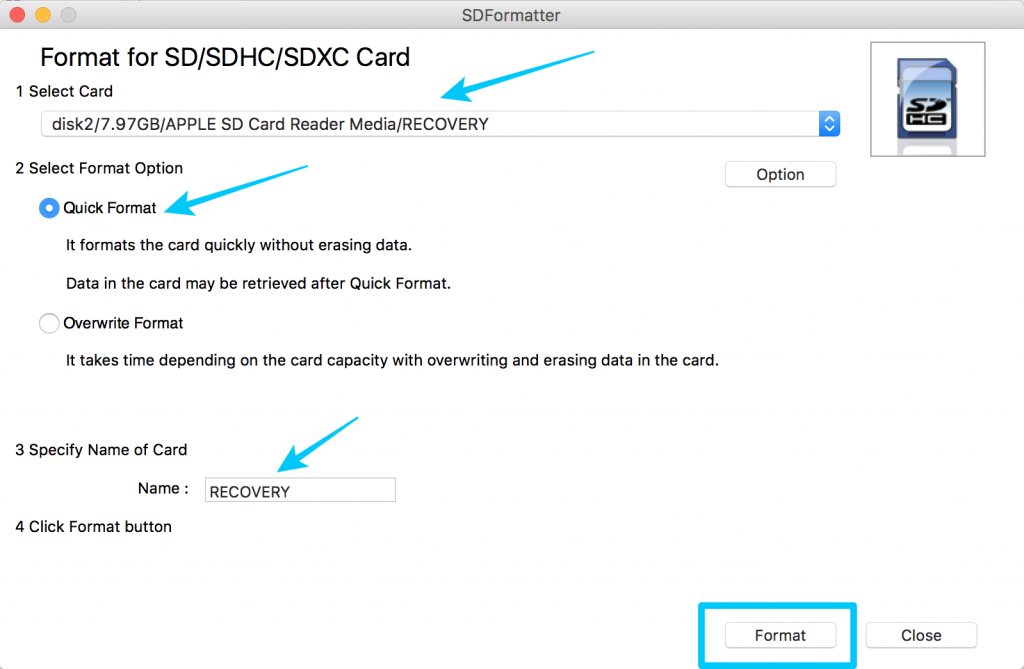
- Use SD Card Formatter 4.0 to format your microSD card. You can download the software here for both Windows or Mac.
- In SD Card Formatter, select the Card that you have just inserted and follow the on-screen instruction to format it.
MOVE OS FILE INTO microSD CARD
- Move the extracted file that you have just downloaded into your microSD card.
- Wait until the transfer finished and safely removed your microSD card.
- Slot in your microSD card into your Raspberry Pi.
BOOTING YOUR RASPBERRY PI
- Ensure the microSD card is properly insert in your Raspberry Pi.
- Plug in your USB keyboard, USB mouse and HDMI cable.
- Connect the microUSB power source to power up your Raspberry Pi.
- Your Raspberry Pi is now booting. Let it boot for a while and you will see a window that will ask you to choose Operating System that you would like to install. For my case, I choose Raspbian. Move forward by clicking Install.
- Raspbian will be installed automatically. Now its time for you to grab your coffee!
- When the installation process is completed, it will be rebooted automatically and you should be able to see the desktop GUI (Graphical User Interface) right away!
- Congratulation, you now have Raspbian installed in your Raspberry Pi 🙂
Ameer.